Railroad Tie Installation Tips
Garden Beds
driveways
Garden walls
Edging
erosion control
1
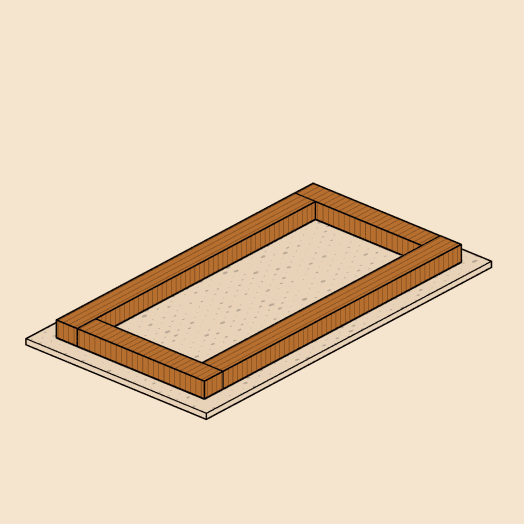
Establish the Base Row
Lay your first course of Beaver ties onto your leveled gravel base. Use a level on every tie — both side-to-side and front-to-back — as any slight tilt in the first row will be magnified as you stack higher.
2
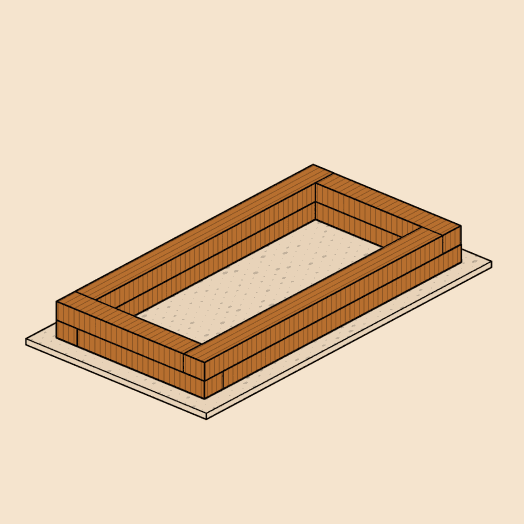
Stack and Stagger
Lay your first course of Beaver ties onto your leveled gravel base. Use a level on every tie — both side-to-side and front-to-back — as any slight tilt in the first row will be magnified as you stack higher.
3
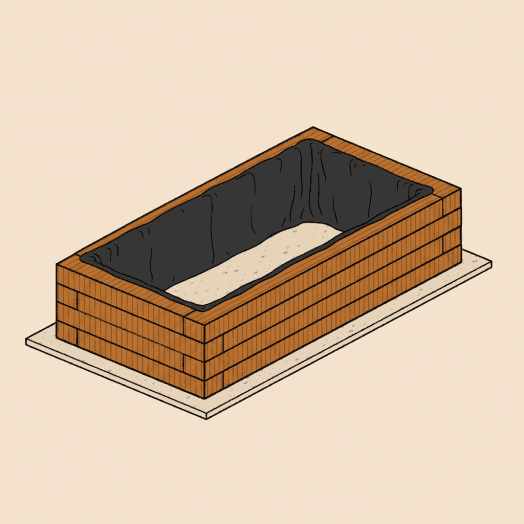
Seal and Line
If your design is more than two layers high, apply a bead of exterior-grade concrete adhesive between the courses. Line the interior walls with a heavy-duty landscape fabric or a BPA-free plastic liner to protect the blocks from moisture and prevent fine soil from leaking through joints.
4
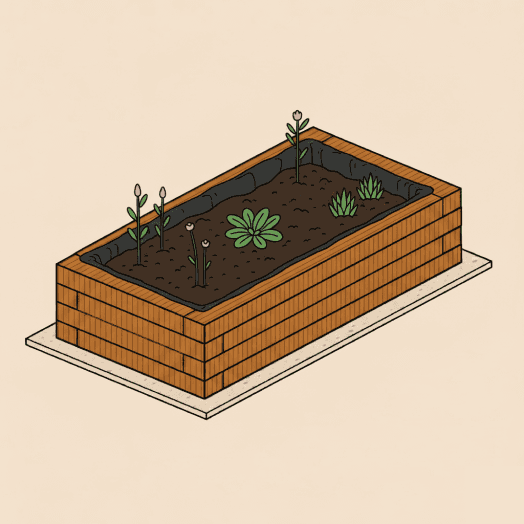
Fill and Plant
Add a 2-inch layer of clean gravel at the very bottom of the bed for drainage, then fill the rest with a 70/30 mix of organic topsoil and compost. Lightly water the soil as you fill it to help it settle before you begin planting.
Garden Beds
driveways
Garden walls
Edging
erosion control
1
Establish the Base Row
Lay your first course of Beaver ties onto your leveled gravel base. Use a level on every tie — both side-to-side and front-to-back — as any slight tilt in the first row will be magnified as you stack higher.
2
Stack and Stagger
Lay your first course of Beaver ties onto your leveled gravel base. Use a level on every tie — both side-to-side and front-to-back — as any slight tilt in the first row will be magnified as you stack higher.
3
Seal and Line
If your design is more than two layers high, apply a bead of exterior-grade concrete adhesive between the courses. Line the interior walls with a heavy-duty landscape fabric or a BPA-free plastic liner to protect the blocks from moisture and prevent fine soil from leaking through joints.
4
Fill and Plant
Add a 2-inch layer of clean gravel at the very bottom of the bed for drainage, then fill the rest with a 70/30 mix of organic topsoil and compost. Lightly water the soil as you fill it to help it settle before you begin planting.
Garden Beds
driveways
Garden walls
Edging
erosion control
1
Establish the Base Row
Lay your first course of Beaver ties onto your leveled gravel base. Use a level on every tie — both side-to-side and front-to-back — as any slight tilt in the first row will be magnified as you stack higher.
2
Stack and Stagger
Lay your first course of Beaver ties onto your leveled gravel base. Use a level on every tie — both side-to-side and front-to-back — as any slight tilt in the first row will be magnified as you stack higher.
3
Seal and Line
If your design is more than two layers high, apply a bead of exterior-grade concrete adhesive between the courses. Line the interior walls with a heavy-duty landscape fabric or a BPA-free plastic liner to protect the blocks from moisture and prevent fine soil from leaking through joints.
4
Fill and Plant
Add a 2-inch layer of clean gravel at the very bottom of the bed for drainage, then fill the rest with a 70/30 mix of organic topsoil and compost. Lightly water the soil as you fill it to help it settle before you begin planting.
(704)-321-0802
(980) 245-4600
174 Marks Creek Church Rd, Hamlet, NC 28345
© Beaver’s Pavers
Designed by Serge Studios
(704)-321-0802
(980) 245-4600
174 Marks Creek Church Rd, Hamlet, NC 28345
© Beaver’s Pavers
(704)-321-0802
(980) 245-4600
174 Marks Creek Church Rd, Hamlet, NC 28345
© Beaver’s Pavers
Designed by Serge Studios